Any user (with a Technician role) can create a report and measure dosimeters.
Create a Dosimetry Report Instructions
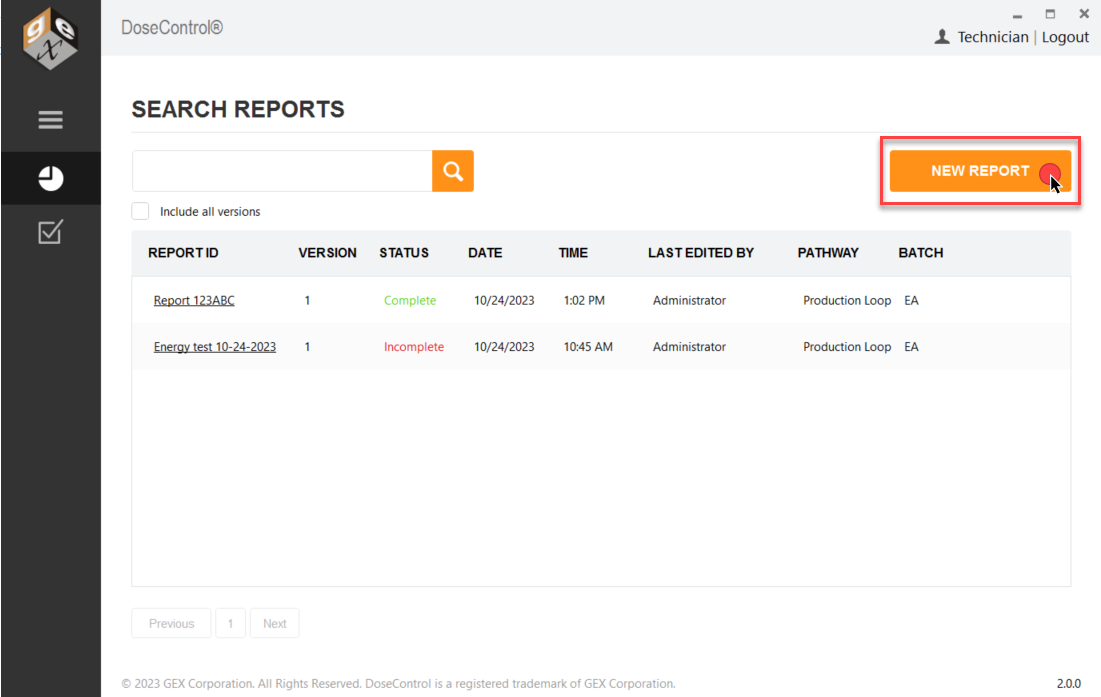
1 On DoseControl’s main screen, click the “New Report” button to create a new dosimetry report and begin dosimeter measurements.
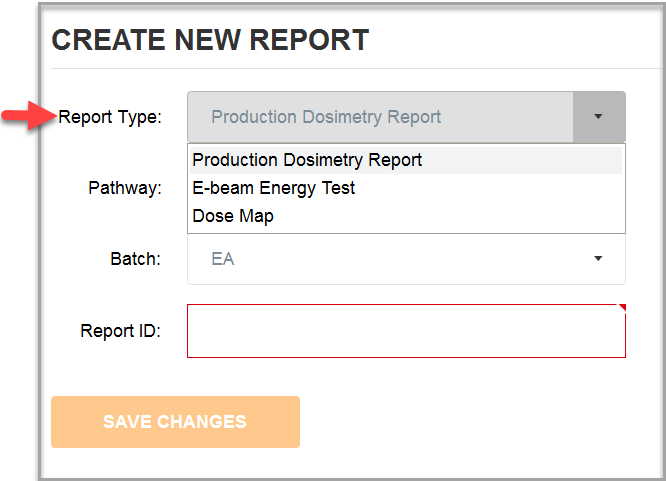
2 Select one of the pre-configured ‘Report Type’ options from the dropdown menu.
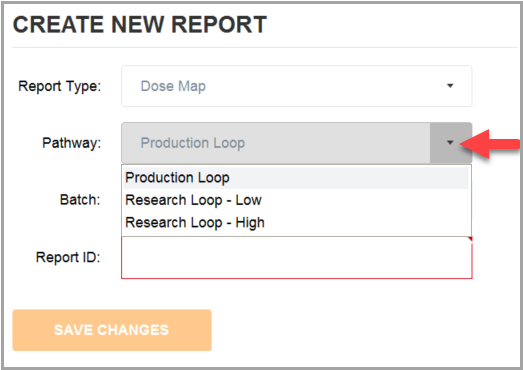
3 Select a ‘Pathway’ (Irradiation pathway) option from the dropdown menu.
4 Select a ‘Batch’ (dosimeter batch) option from the dropdown menu.
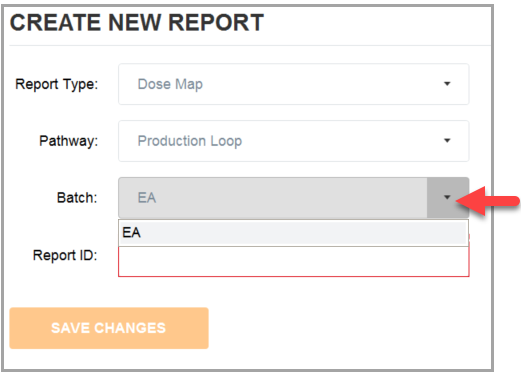
5 Enter a new, unique Report ID to name the new dosimetry report. Click “Save Changes” button.
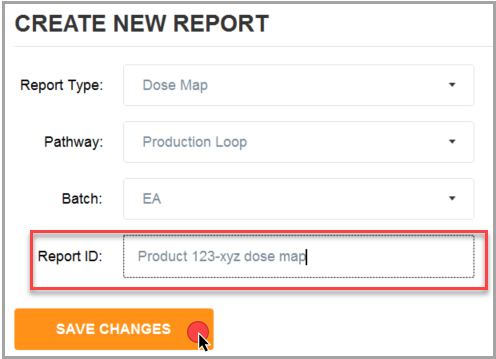
Do not use any forbidden printable ASCII characters (illegal filename characters) in the Report ID! < > : “ / \ | ? *
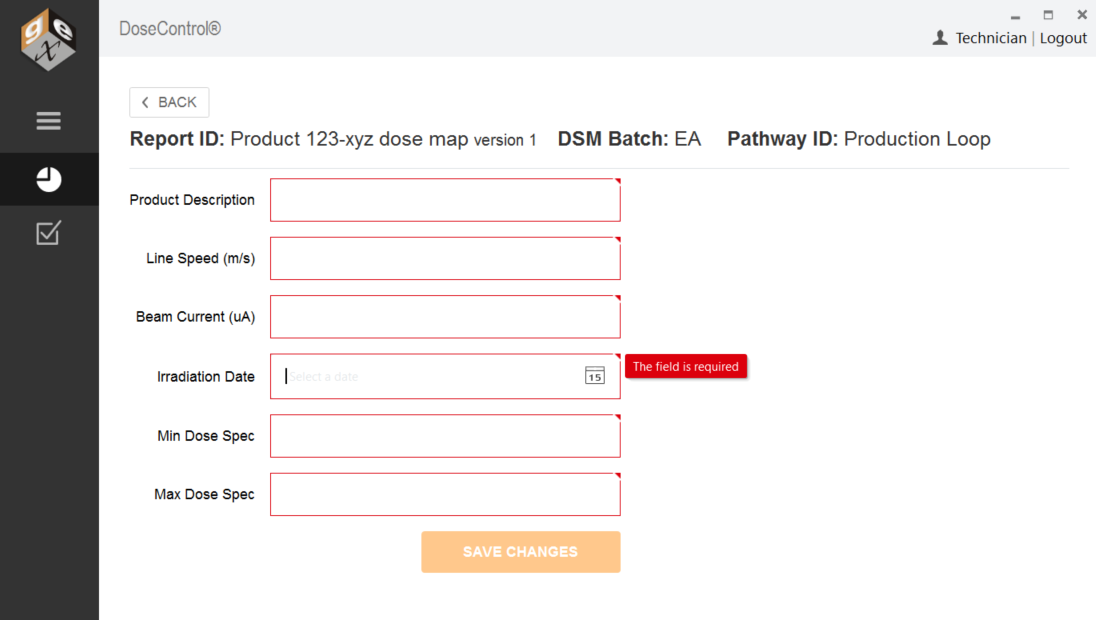
6 Enter values into the report’s header fields (if prompted). Click “Save Changes” when complete.
If there are no report headers setup for the Report Type selected, simply click the “Save Changes” button to go to the measurement screen.
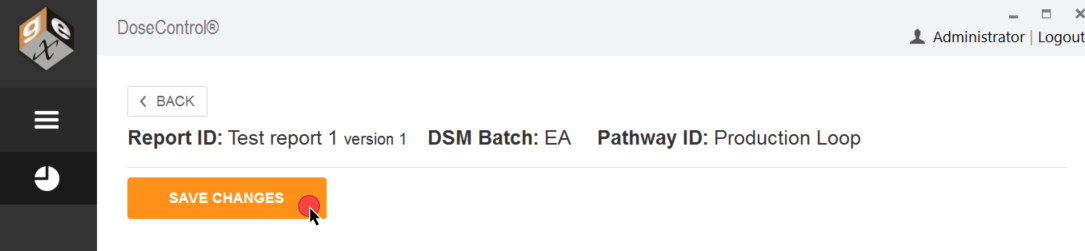
Reminder - The Application Admin can setup report header fields for each Report Type. The report header fields are unique to your process.
7 Next, DoseControl will open the dosimeter measurement screen and prompt the user to prepare to zero ‘0’ the spectrophotometer (Reader) and begin measurements.
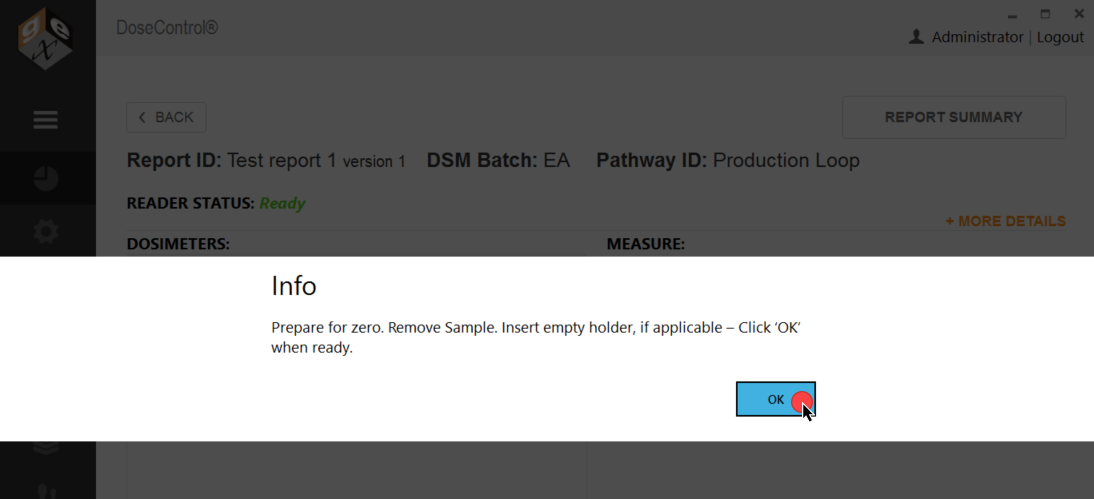
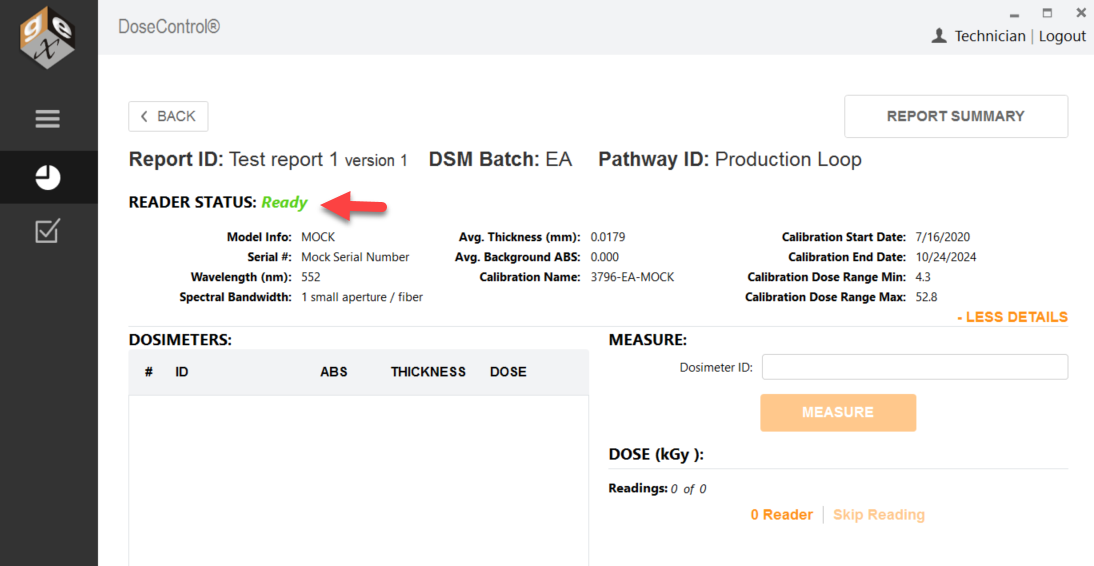
8 After zeroing the Reader, the dosimeter measurement screen will then open and is now ready for the user to perform measurements. Reader Status should say Ready.