
Prerequisite - Have you installed MS SQL Server Express and installed SSMS (SQL Server Management Studio?
Configure SQL Server Express for Use with DoseControl
Still logged in as an administrator, follow the remaining steps to configure SQL Server Express so that DoseControl will work on your system.
1 Connect to your Database Server
If not already, open SQL Server Management Studio (SSMS) (you can locate SSMS in the Window Start menu). In the Connect to Server window, the Server name field should automatically display your SQLEXPRESS server. Authentication should be set to Windows Authentication. Click “Connect”.
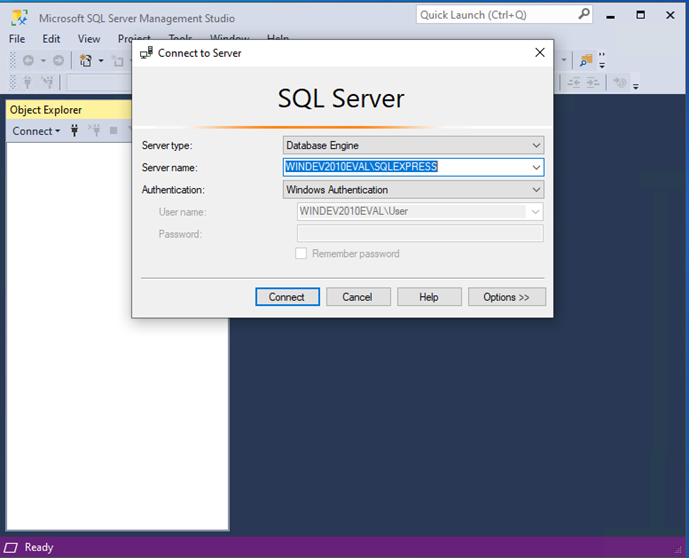
2 Configure SQL Authentication logins
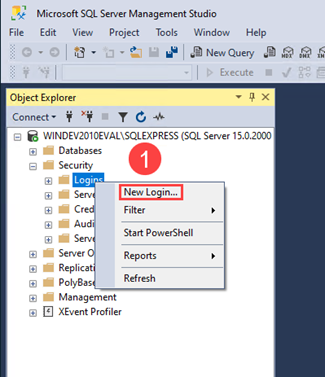
Step 1: Expand the “Security” folder for the SQL server on which your DoseControl database will reside. Right-click on “Logins” and select “New Login…”.
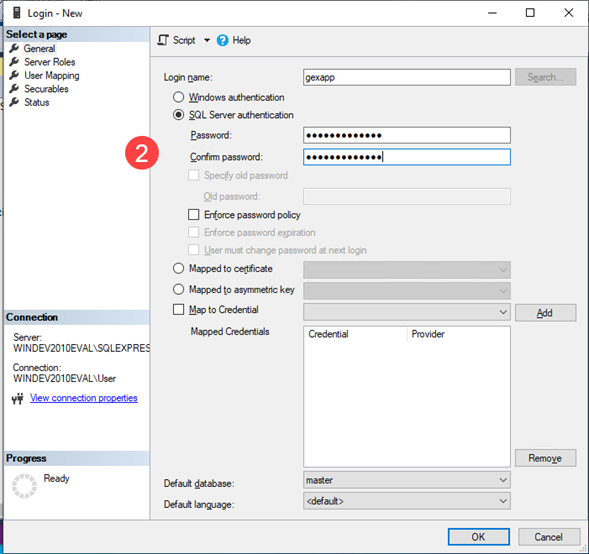
Step 2: In the “General” section, enter the Login name gexapp (all lower case, no spaces). Select “SQL Server Authentication”. Enter a Password and Confirm password. Unless your IT department or database administrator require you to enable a password enforcement policy, uncheck “Enforce password policy”.
IMPORTANT: Ensure that you make a copy of the password and keep it in a secure location.
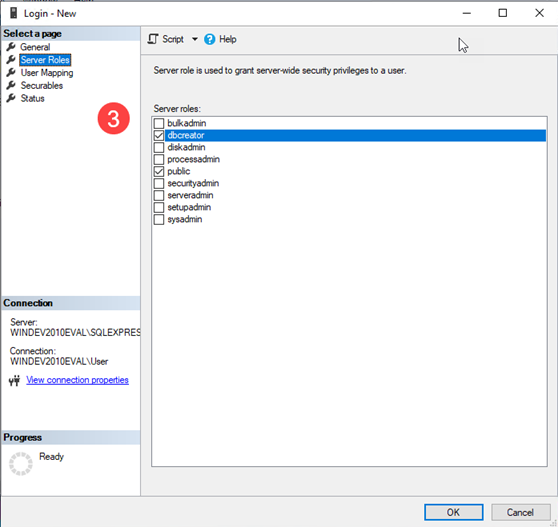
Step 3: Next, select the “Server Roles” section and ensure “dbcreator” and “public” are selected. Click OK.
The user must have the ‘dbcreator’ and ‘public’ server roles. When DoseControl software first connects to MS SQL Server it will create the application database. If the user does not have these roles assigned, DoseControl will not connect properly.
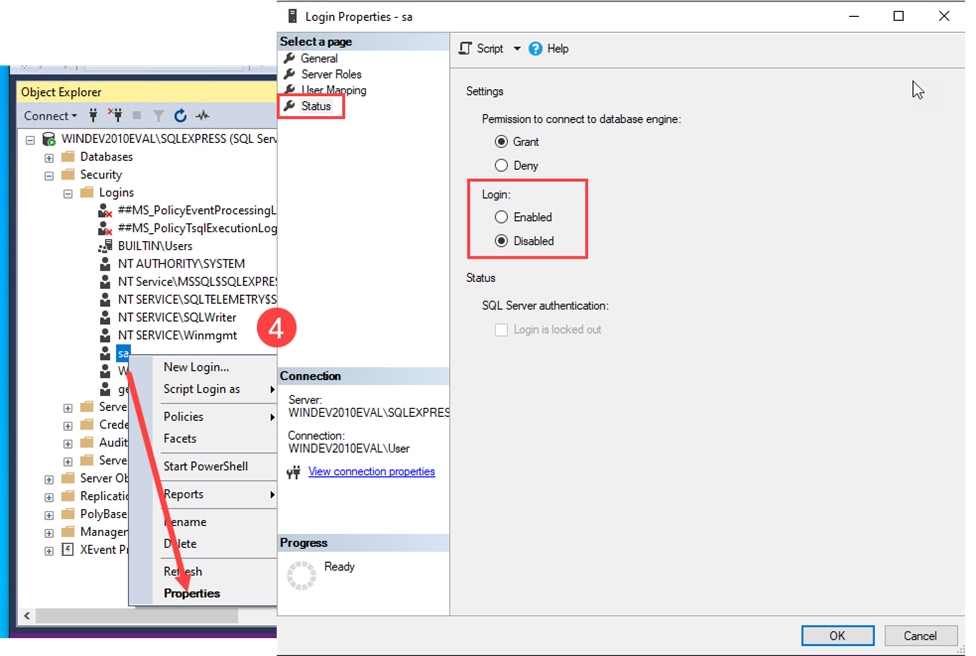
Step 4: As a security precaution, expand the Logins folder, right click the “sa” login, and select Properties. Open the Status section, and under Login, select Disabled and then click “OK”.
See the following screenshots for clarification:
Use Server information in the connection string.
Learn how to Create a Connection String for DoseControl
A connection string format can look like the following:
Data Source=<servername\datasource>;Initial Catalog=GEXApp;User ID=<your SQL Server Authentication Username>;Password=<your SQL Server Authentication password>;MultipleActiveResultSets=true;