
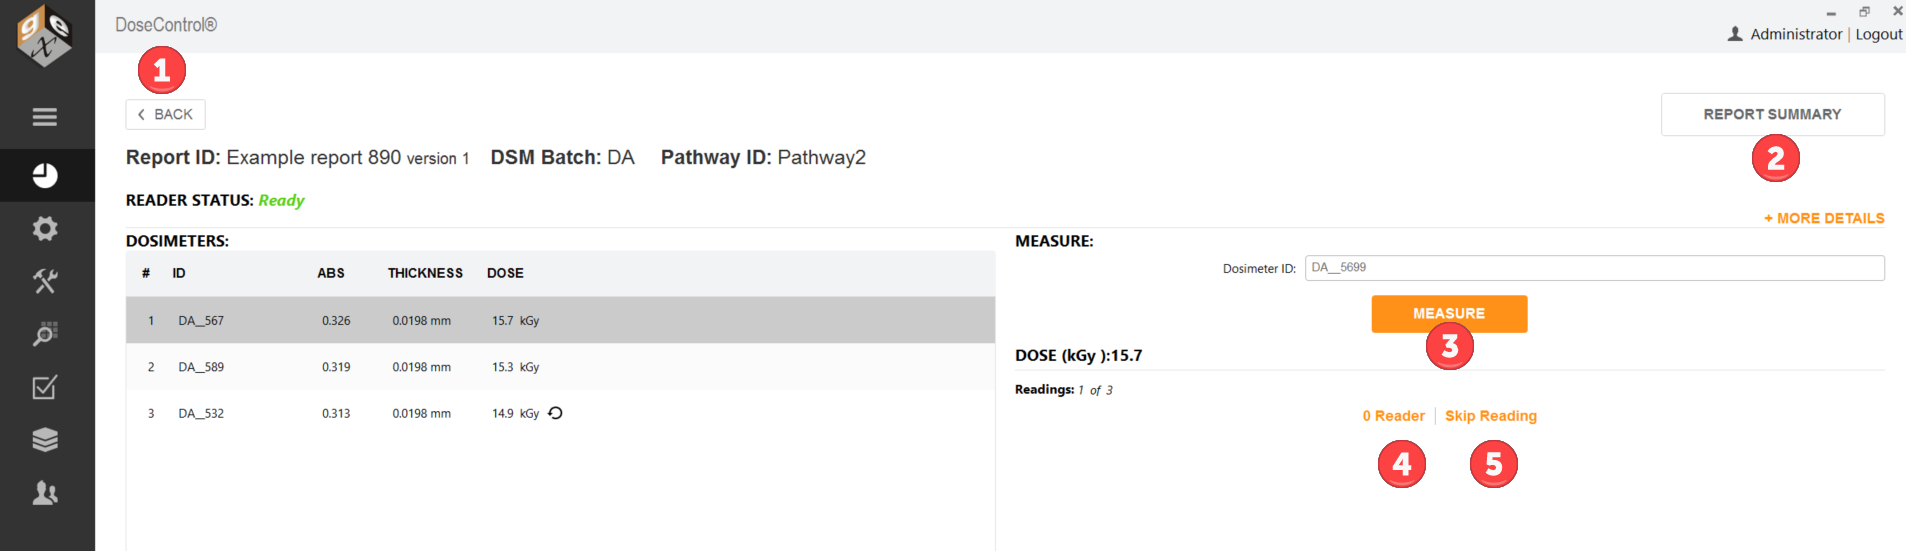
1 Back – Return to the Home Screen
2 Report Summary – view the Report Summary screen (see Report Summary section for details).
3 Measure – Measure button inserts the dosimeter ID into the database, verifies the instrument wavelength setting, and then measures the dosimeter absorbance if the setting is correct. If it is not correct, the instrument will correct it or will inform the technician that it is unable to proceed.
4 0 Reader – Initiates the on-screen messages and workflow to zero the spectrophotometer (the zeroing workflow is forced for all users each time a new measurement session is opened or re-opened).
NOTE
For G20 users: If the user presses the zero button on the G20 instrument, the zeroing event is not recorded in the software audit trail. There is no method currently available for disabling the zero button on the G20 instrument. Train operators to only zero the G20 instrument through the software and not to use the buttons on the instrument so that the event is recorded in the audit trail.
5 Skip Reading – allows the user to create a record when a reading must be skipped (e.g. lost dosimeter), and the user is required to enter a reason that becomes part of the report comments.
After a dosimeter measurement
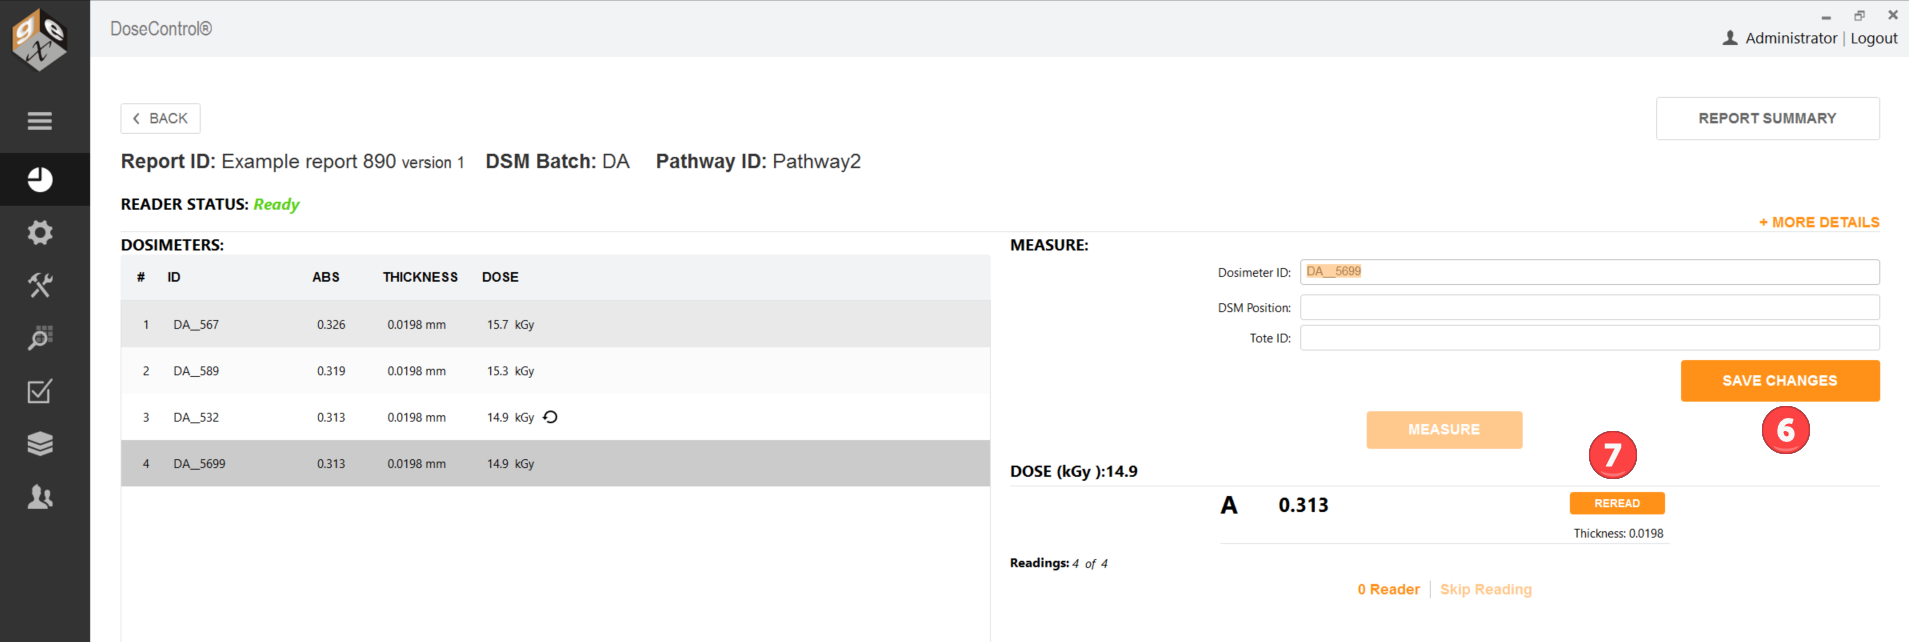
6 Save Changes – User can enter a DSM (dosimeter) position and Tote ID, then click Save Changes to associate this information with the Dosimeter.
7 Reread – Initiates the workflow for re-measurement of a sample, based on the user configuration described earlier and using methods as described in Rereads section. This button only appears after the initial measurement of a dosimeter has been made.
If ‘Edit Thickness’ Permission is active
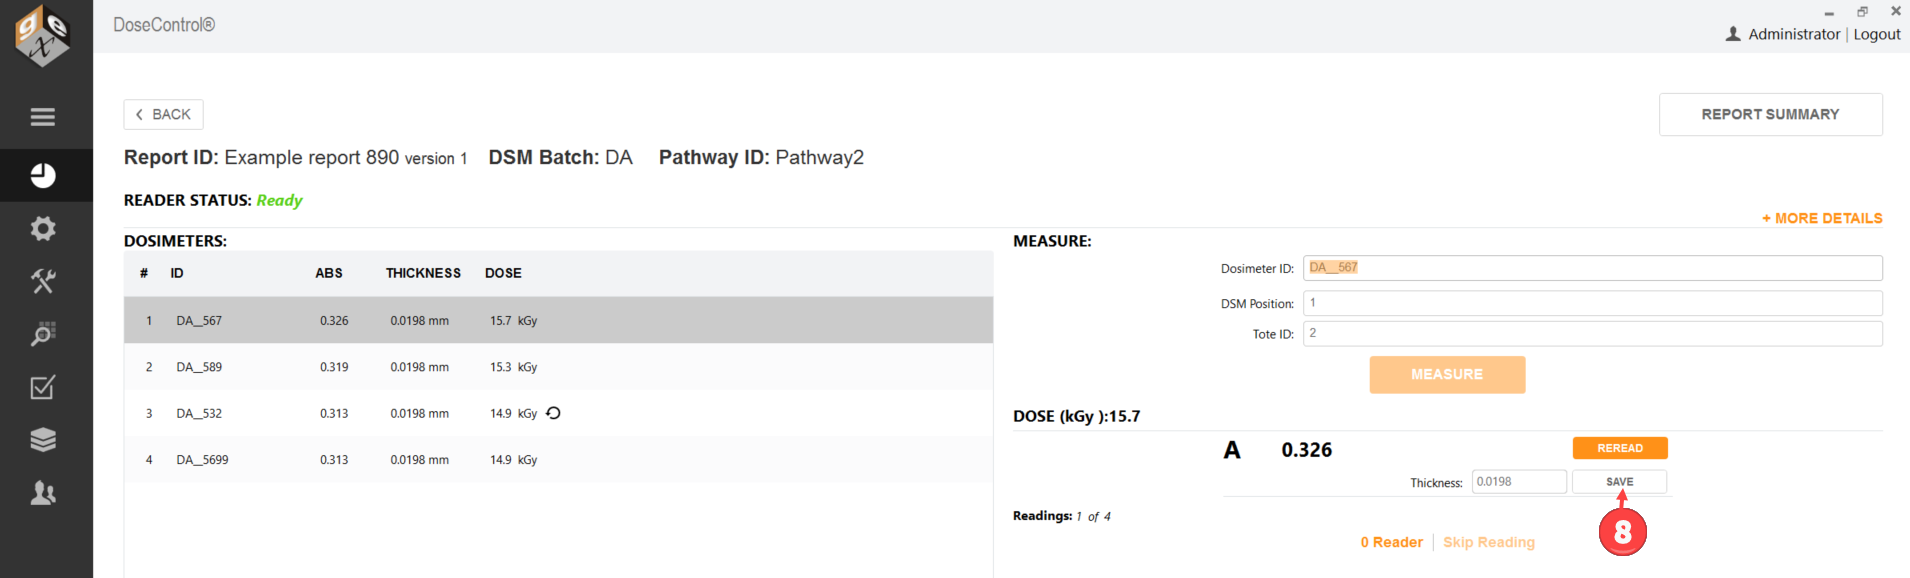
8 Save – User can enter a thickness value for the dosimeter and click Save. Only available if the ‘Edit Thickness’ permission is active.