
CAUTION! If you have an Enterprise/Premier license and have multiple computers connected to a shared database - you must update ALL DoseControl computers. Be aware: the instant you connect an updated DoseControl computer to the shared database, the database will update. (This means any DoseControl workstation with an older version will not work.)
You DO NOT need to uninstall your old version of DoseControl! Simply run the GEX Installer (v2.1) and the installer wizard will walk you through the uninstallation of the old version and will create ‘manifest’ summary of your old installation information This manifest will contain a list of the previous installation modules and an unencrypted database connection string. The manifest is intended as a convenience for users. You can delete this file after upgrading.
Prerequisites
CAUTION! Always make a backup of your application database prior to upgrading DoseControl software.
You will need administrator privileges for your computer on your network to install GEX DoseControl software and the associated peripheral drivers, or you will need your IT personnel with admin privileges to install the software for you.
-
Check that your computer meets current platform requirements for DoseControl. See Platform Requirements.
-
Make a backup of your application database. Need help? Follow our guidance here.
-
Make a copy of your database connection string (System → Master connection string).
-
Do not uninstall the old version of DoseControl.
-
GEX provides users with a DoseControl Software License. If you have purchased an Enterprise License and/or Product Specification Module, your license information will automatically transfer with the upgrade.
Download the GEX DoseControl installer file and remove security block
-
Download the GEX DoseControl installation folder package to your computer.
-
Unzip the folder.
-
Place the GEX DoseControl.msi installer file onto your desktop.
-
Remove any security blocks on the GEX DoseControl.msi installer file. Right-click the installer, go to Properties. On the General tab, locate the Security section and tick the ‘Unblock’ checkbox. This removes any Windows security blocks that may occur when you download the installer to your computer.
Run the GEX DoseControl installer
-
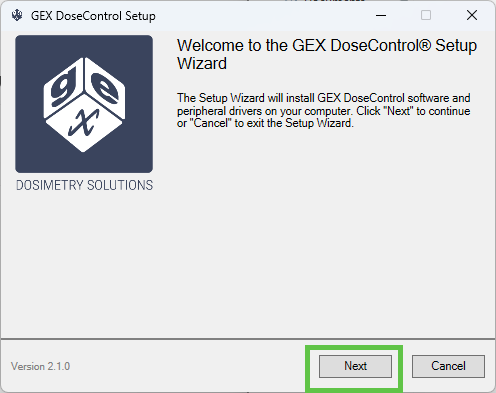
GEX DoseControl setup wizard screen - click ‘Next’ to continue installation or ‘Cancel’ to exit the wizard.
-
-
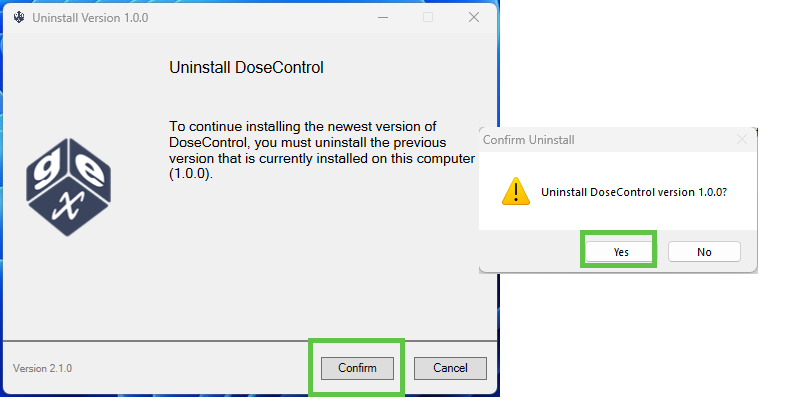
Uninstall DoseControl. This will uninstall the previous version of DoseControl software and produce a manifest document detailing the modules installed in the older version. Click ‘Confirm' to proceed, and then click ‘Yes’ in the pop-up message.
-
-
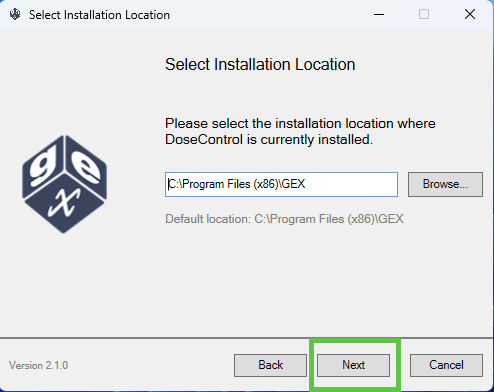
Select Installation Location. Click ‘Next’ to accept the default installation location of your current version of DoseControl. (If you had previously installed DoseControl in a different location, navigate to the installation directory.)
-
-
-
Follow the prompts to allow the DoseControl wizard to uninstall the older version of software.
-
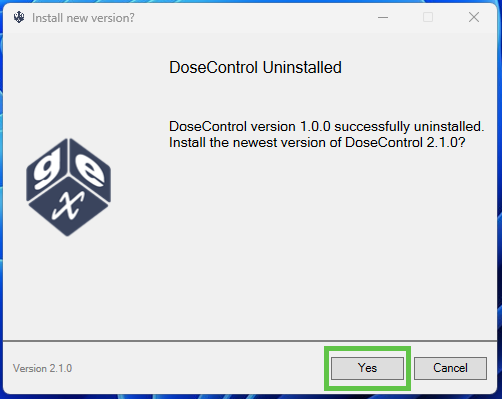
DoseControl uninstalled. View the status notification of the successful uninstall of the older version.
-
Click ‘Yes’ to proceed with the installation of the new version of DoseControl.
-
-
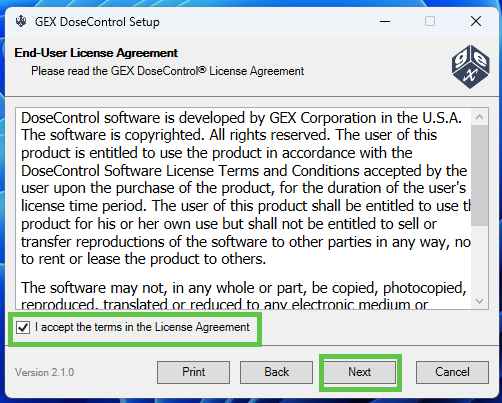
End-User License Agreement - Accept the terms in the License Agreement. Click ‘Next’.
-
-
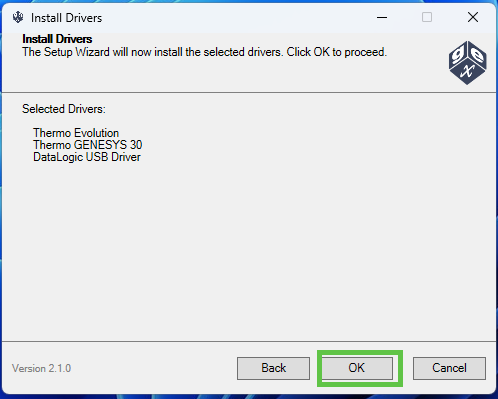
Connected spectrophotometers - The installer wizard will automatically install the spectrophotometer (Readers) to use with DoseControl, based on your previous installation modules. Click ‘Next’ to proceed.
-
-
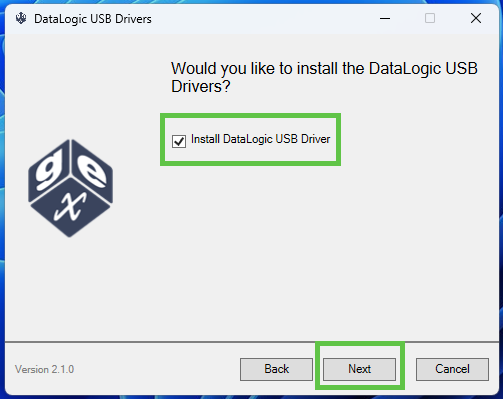
Option - Install Datalogic USB Driver? You have the option to install the Datalogic USB Driver for the Datalogic Matrix 120 barcode scanner (internal scanner for DoseControl). This will install the latest Datalogic USB driver version.
-
To skip this step, click ‘Next’ to continue without installing this driver.
-
Select “Install Datalogic USB Driver” to install this driver (optional).
-
-
-
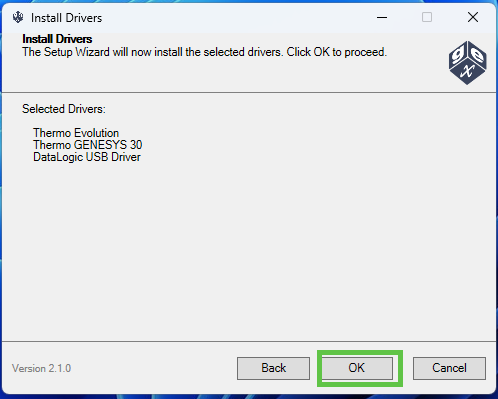
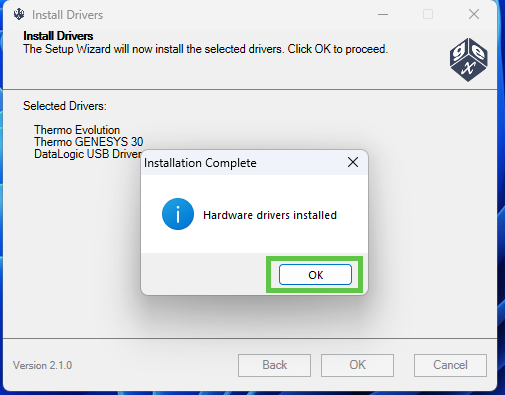
Confirm the selected drivers for the hardware items. Click ‘OK’ to proceed.
-
-
The GEX DoseControl setup wizard will install the necessary USB drivers for the hardware items for each spectrophotometer. Follow the prompts to complete.
-
For each hardware driver installed, you will be prompted to ‘allow changes to your Windows device'. Click to accept. You will see a progress bar and completed task for each item.
-
The setup wizard will scan your computer for existing drivers. It will update any necessary drivers, as needed.
-
If you selected the “Install Datalogic USB Driver” option, you will see a Datalogic USBCOM driver setup wizard. Follow the prompts to install.
-
When the installation of peripheral drivers is complete, click ‘OK’.
-
-
-
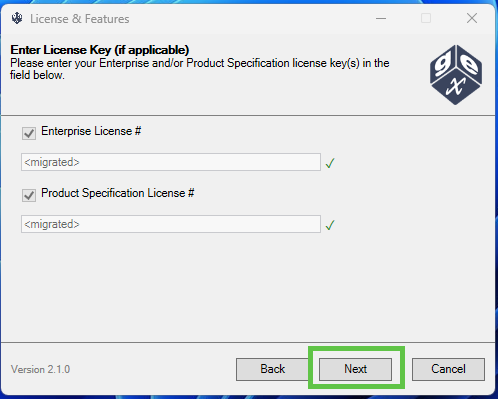
If you have an existing Enterprise License or Product Specification Module, this information is automatically migrated based on your previous installation. Click ‘Next’ to continue.
-
-
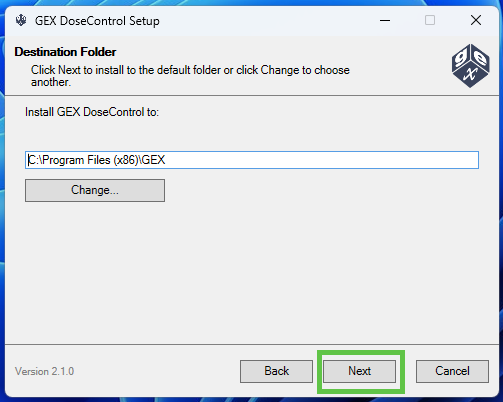
Accept the default installation destination folder or click ‘Change’ to install in a different folder. Click ‘Next’ to continue.
-
-
You will be prompted Windows to ‘allow this app to make changes to this computer’ or asked to login as administrator to complete the installation.
-
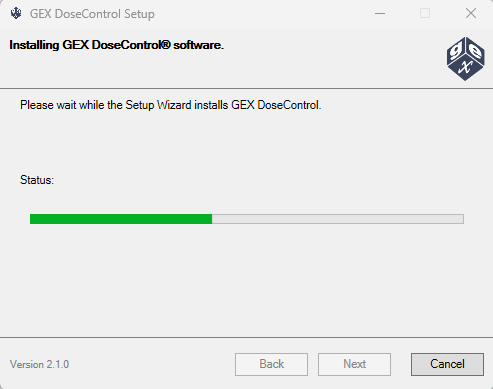
You will see an installation status screen.
-
-
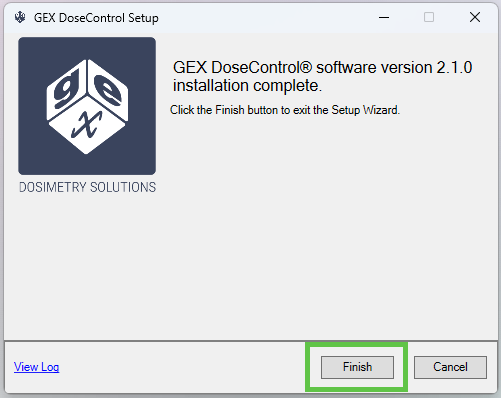
Installation is complete. Click ‘Finish’ to close the installer wizard.
-
Open DoseControl
-
Run GEX DoseControl software by double-clicking the shortcut icon on your desktop.
-
-
DoseControl will open and require the master connection string. Enter your connection string and click ‘Save Changes’. You will be prompted to restart the software.
-

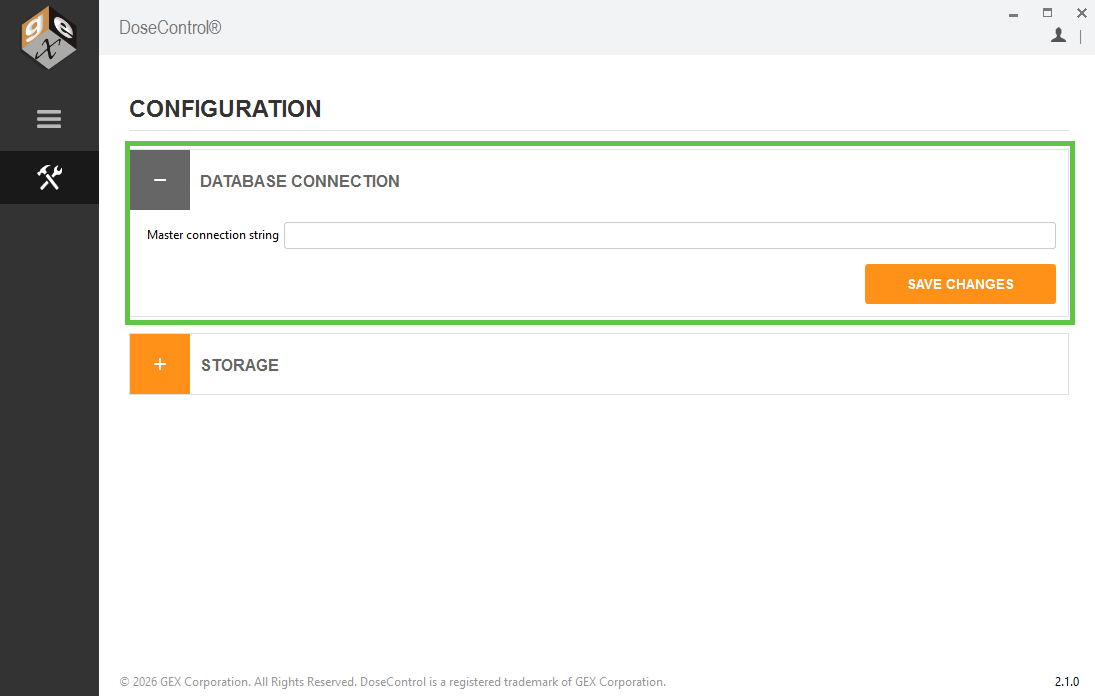
Lost your connection string information? Look in the modulemanifest.txt file for a copy! Located in C:\ProgramData\GEX\Uninstall
-
Reopen DoseControl. Login using your username and password. You will see your reports and data!
Uninstall ‘Manifest’
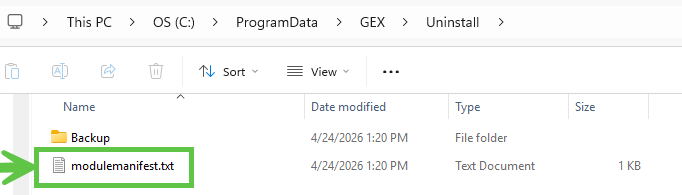
After completion of the upgrade, the GEX installer wizard produces a backup and manifest of items from your old installation, located in C:\ProgramData\GEX\Uninstall. The manifest is intended as a convenience for users. You can delete the Uninstall folder after upgrading.
-
This ‘manifest’ contains a list of the previous installation modules, a list of report storage location settings, and an unencrypted database connection string.
-
The ‘Backup’ folder contains the DC Export to Excel template (excel.template.xlsx), and any resources (i.e. logo files) from the previous installation.
Install custom PDF Report module
-
If you have a custom PDF Report module, you must install this manually.
-
Download the GEX DoseControl installation folder package to your computer
-
Unzip the folder.
-
Remove any security blocks on the *.Pdf.dll file (and any graphic file). Right-click the installer, go to Properties. On the General tab, locate the Security section and tick the ‘Unblock’ checkbox.
-
-
Copy/paste the Pdf.dll file into the C:\Program Files (x86)\GEX\Modules folder.
-
If needed, copy/paste the company logo file into the C:\Program Files (x86)\GEX\Resources folder.
Problems?
Contact GEX support for assistance!
Disclaimer -The information contained in this document is provided “as is” and is not a substitute for the user’s professional judgement. It is provided as a convenience to those using products provided by GEX Corporation who have sufficient technical skills to evaluate and properly apply the information in this document. It is the responsibility of the user of this document to ensure that the information in this document, and the use of such information, is accurate, complete, applicable to the product, suitable for the user’s purposes, and in compliance with all laws and regulations. GEX Corporation believes the information provided in this document is accurate and reliable as of the time of writing, but it undertakes no obligation to update or correct this document. GEX Corporation may, but is not required to, make changes to this document at any time without notice. By using the information in this document, the user represents and warrants that he or she has the skills necessary to properly understand and apply this information and that he or she will comply with all applicable laws and regulations including, without limitation, those relating to medical devices, pharmaceutical products, or other applicable industries. The user assumes all risks associated with using this information and any results or output resulting from the application of this information to GEX Corporation’s products. The user agrees not to hold GEX Corporation liable for any errors or omissions contained within.